Here is a guide for connecting Ignition to a Kepware OPC-UA server.
- Disable anonymous logins.
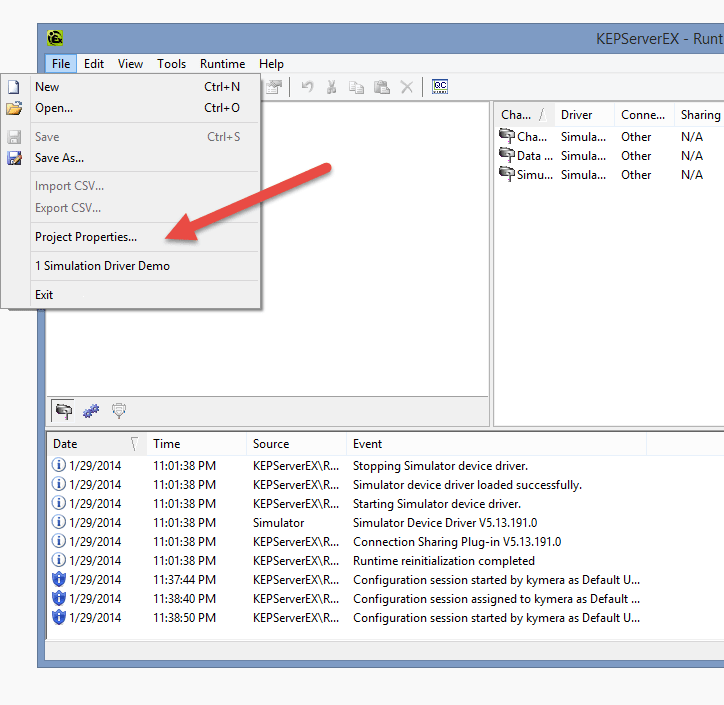
You could probably skip this step, but we feel it adds a bit more security, so we do it.- Open the Kepware Configuration tool. Click “File” > “Project Properties…”.
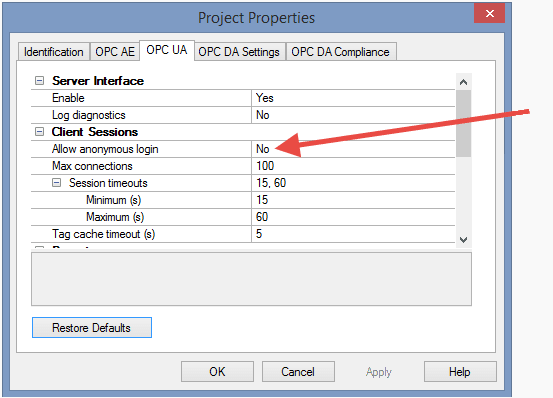
- Click the “OPC UA” tab. Change the “Allow anonymous login” option to “No”.
- Open the Kepware Configuration tool. Click “File” > “Project Properties…”.
- Configure OPC-UA User
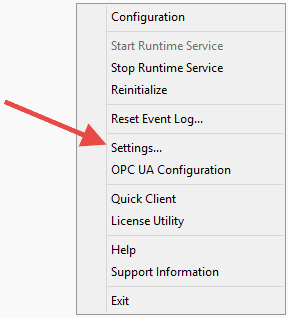
- Click “Settings…”.
- Click “User Manager” tab > Add user button.
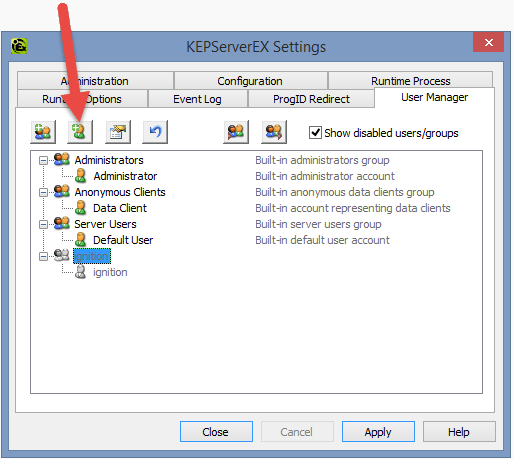
- Add your user. This is just an example.

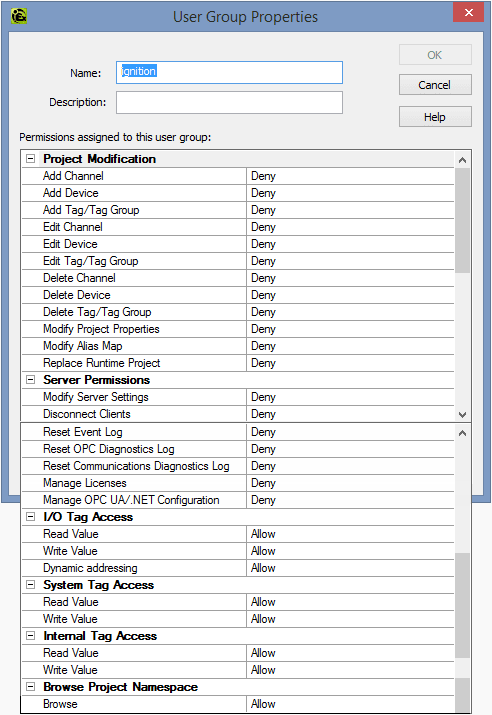
- Set user permissions as follows.
- Click “Settings…”.
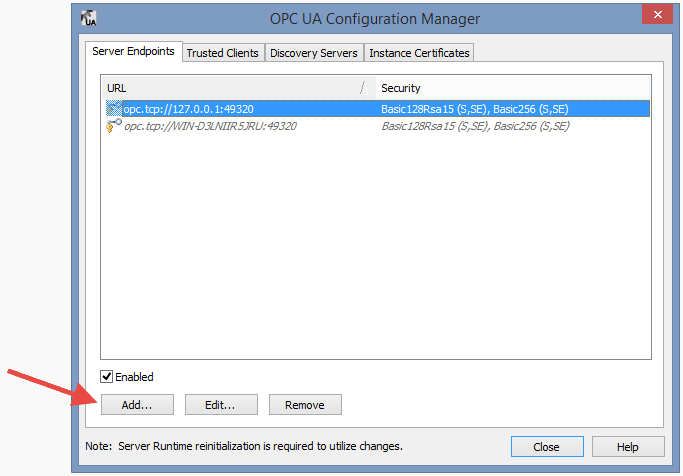
- Set up OPC-UA Endpoints.
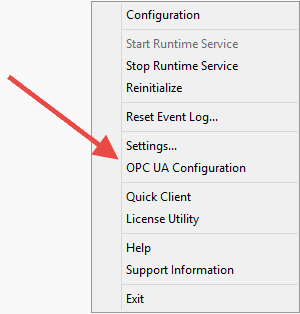
- Click “OPC UA Configuration”.
- Make sure you add end points for the interfaces you want to use by clicking the “Add…” button.
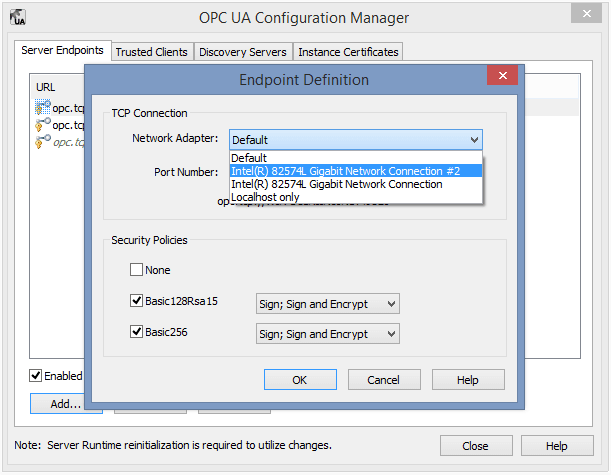
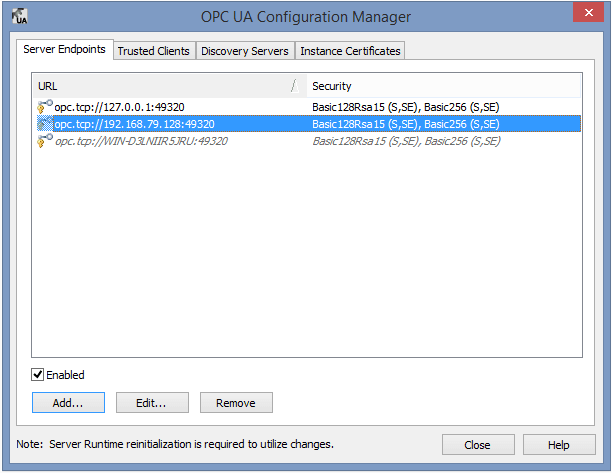
- Click “OPC UA Configuration”.
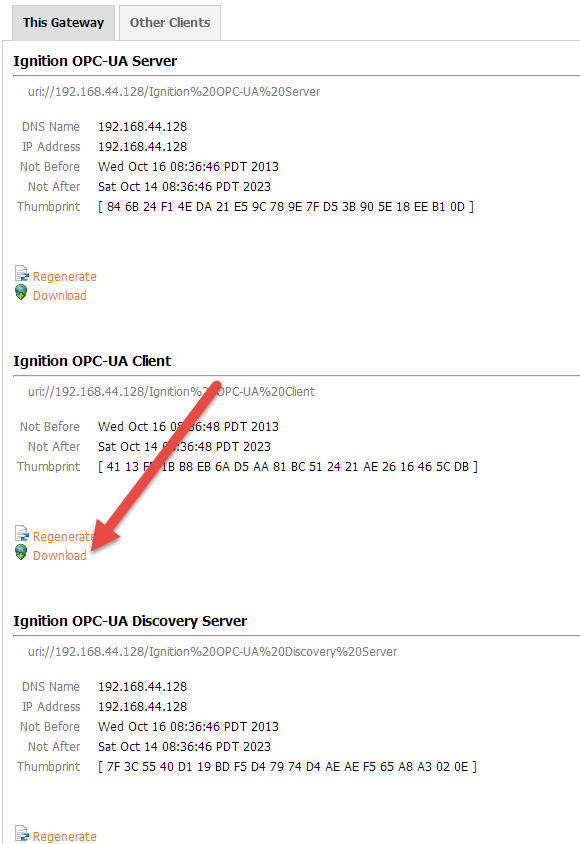
- Import Ignition Client Certificate
- Browse to your gateway. Click” OPA-UA” > “Certificates”.
- Click “Download” to export your Client Certificate.
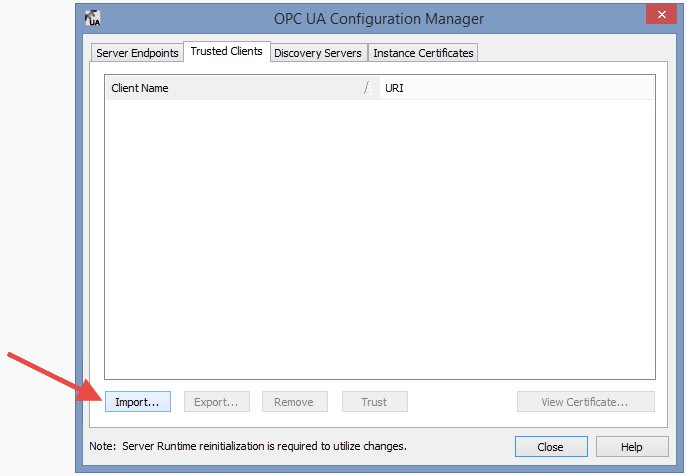
- Click “Trusted Clients” tab > “Import…” button to import the previously exported client certificate. Close OPC-UA Configuration Window.
- Re-initialize Kepware Runtime.
- Click “Reinitialize” to re-initialize the Kepware Runtime.

- Click “Reinitialize” to re-initialize the Kepware Runtime.
- Configure connection from Ignition to Kepware.
- On the Ignition gateway, click “OPC Connections” > “Servers” > “Create new OPC Server Connection….”
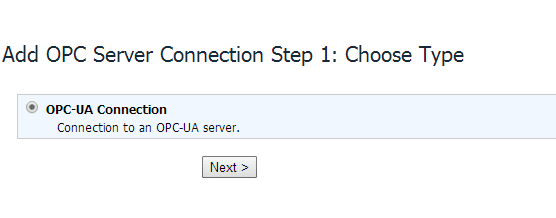
- Add an OPC-UA Connection.
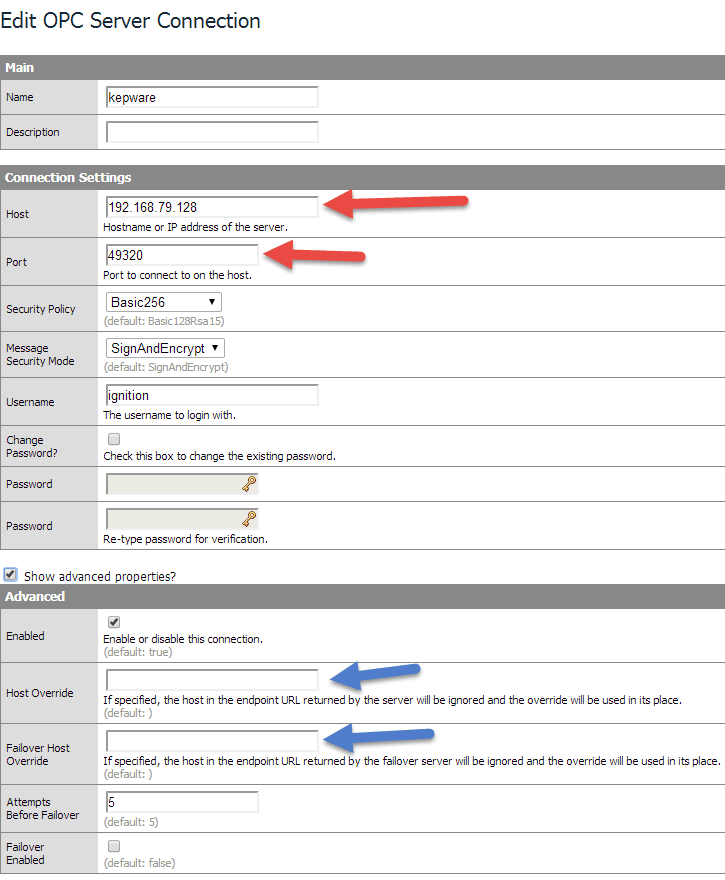
- Configure the connection. You will need to enter your end point and user information from steps 2 and 3 here. If you are using a NAT to access your Kepware server from a remote subnet, you will need to override your endpoint hosts under the advanced settings, identified by the blue arrows. If you are not using a NAT, you should leave these blank.
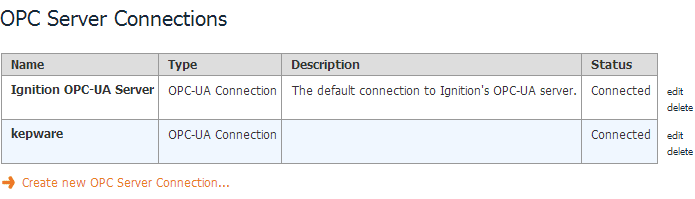
- Click “OK”. You should now have a successful connection from Ignition to Kepware.


